This lesson will show you the necessary steps to edit course content and commit changes to the repo the course lives in. We will split this process into 3 parts.
- Getting access to the repo
- Cloning the Repo
- How to commit changes
Managing Content on Andamio
Part 1: Getting access to the repo
Ask your workgroup lead who is the admin of the repo. You will need to send the admin of the repo an email asking them to add you to the repo so you can make changes to the files. The admin will then send you an invite via GitHub and you will receive an email. The link in the email will take you to the repo where you will have access to make changes.
This is the current link to the repo
Part 2: Cloning the repo
For this step you would need the following things -
- A GitHub account
- Access to the Dework PBL repo.
- GitHub Desktop installed on your PC
- VSCode installed on your PC
You will need to send the admin of the repo an email asking them to add you to the repo so you can make changes to the files. The admin will then send you an invite via Github and you will receive an email. The link in the email will take you to the repo where you will have access to make changes.
Open the repo and click on the clone dropdown arrow, then click on the copy url button for the “Clone with HTTPS”
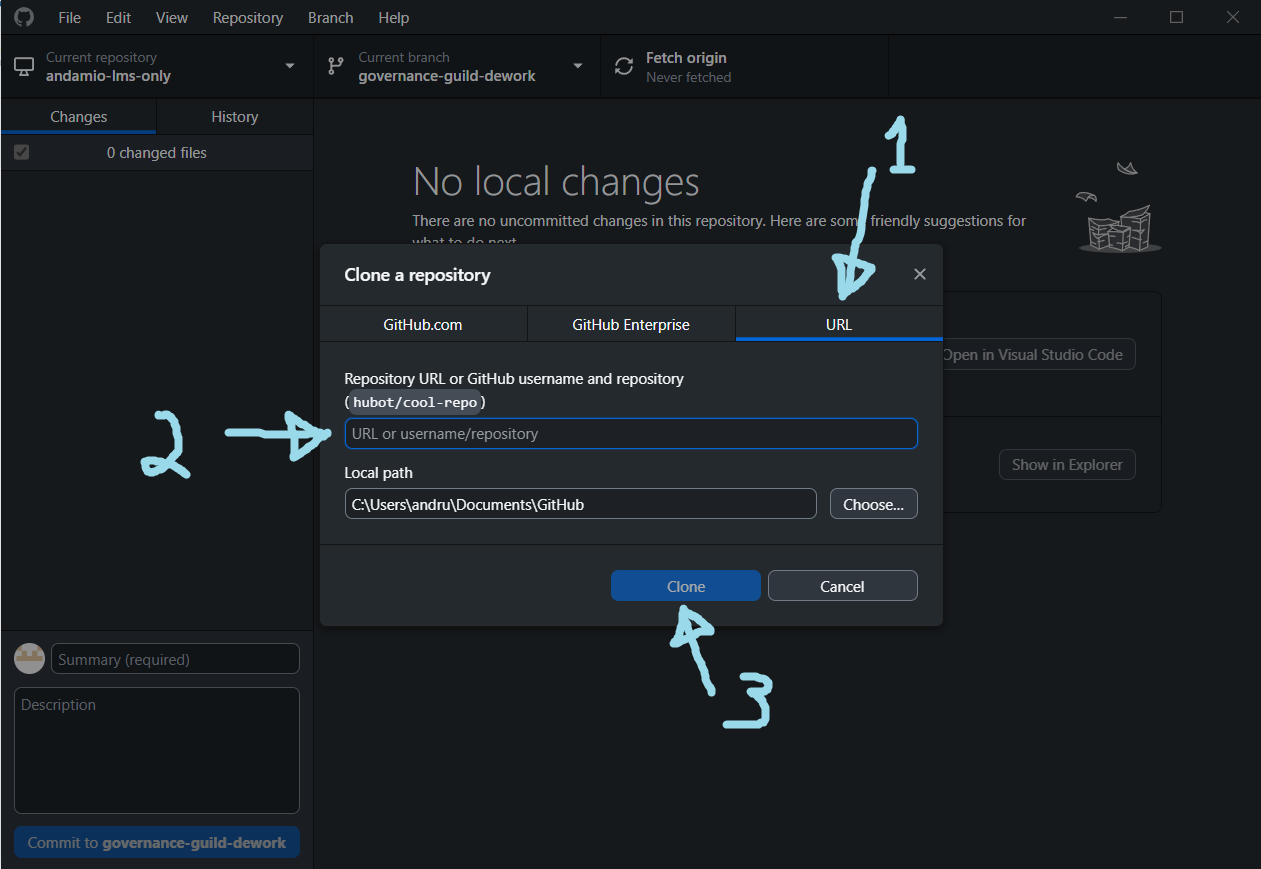
Open your GitHub Desktop App and Click on File in the top left and select Clone repository. A small window will pop up. You will then need to do the following
- Select URL
- Paste the url in the url field
- Click on clone
Another window will pop up that asks for your GitLab username and password. Complete the fields and submit.
Finally you will see this window. Proceed with the following steps
- Click on the dropdown and select the branch you need to edit (In our case the governance-guild-dework branch)
- Click on Open in Visual Studio Code
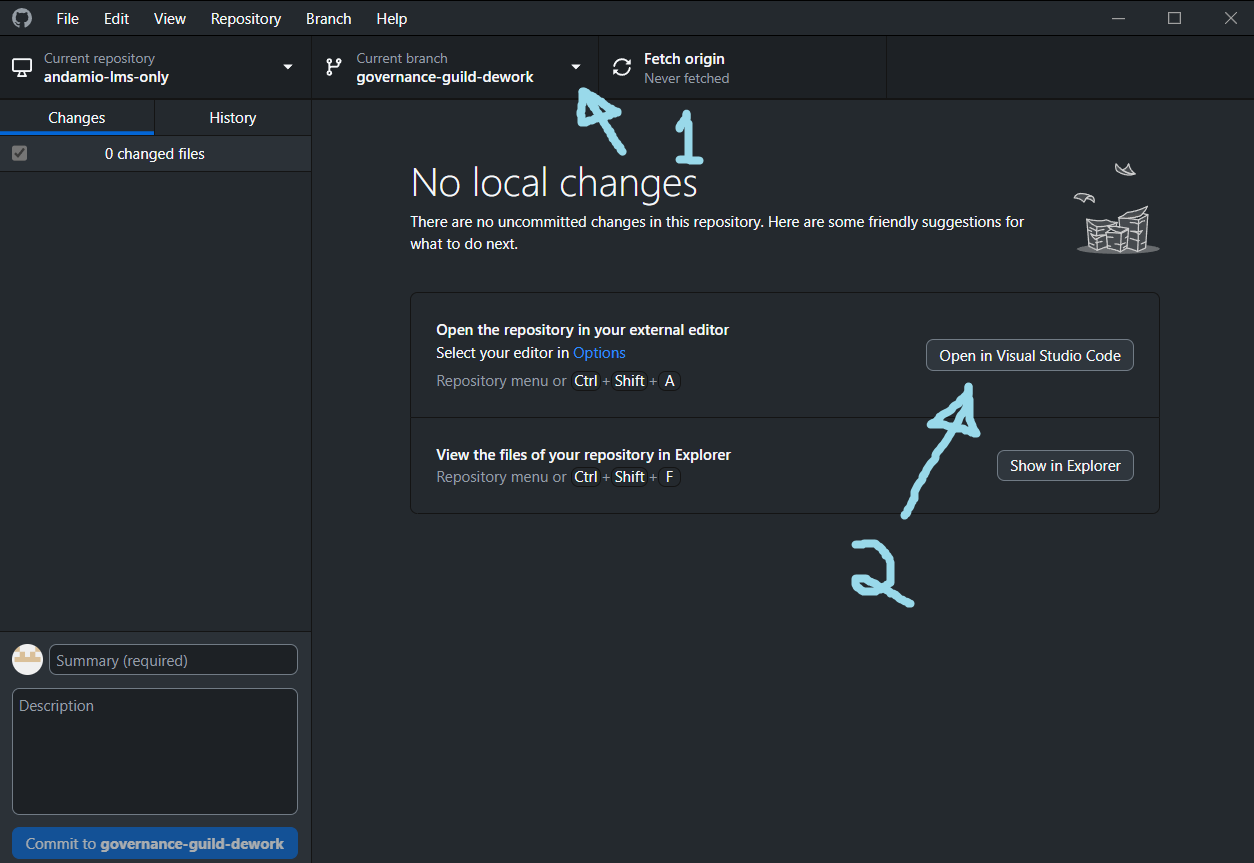
VSCode will open with your cloned repo ready to edit.
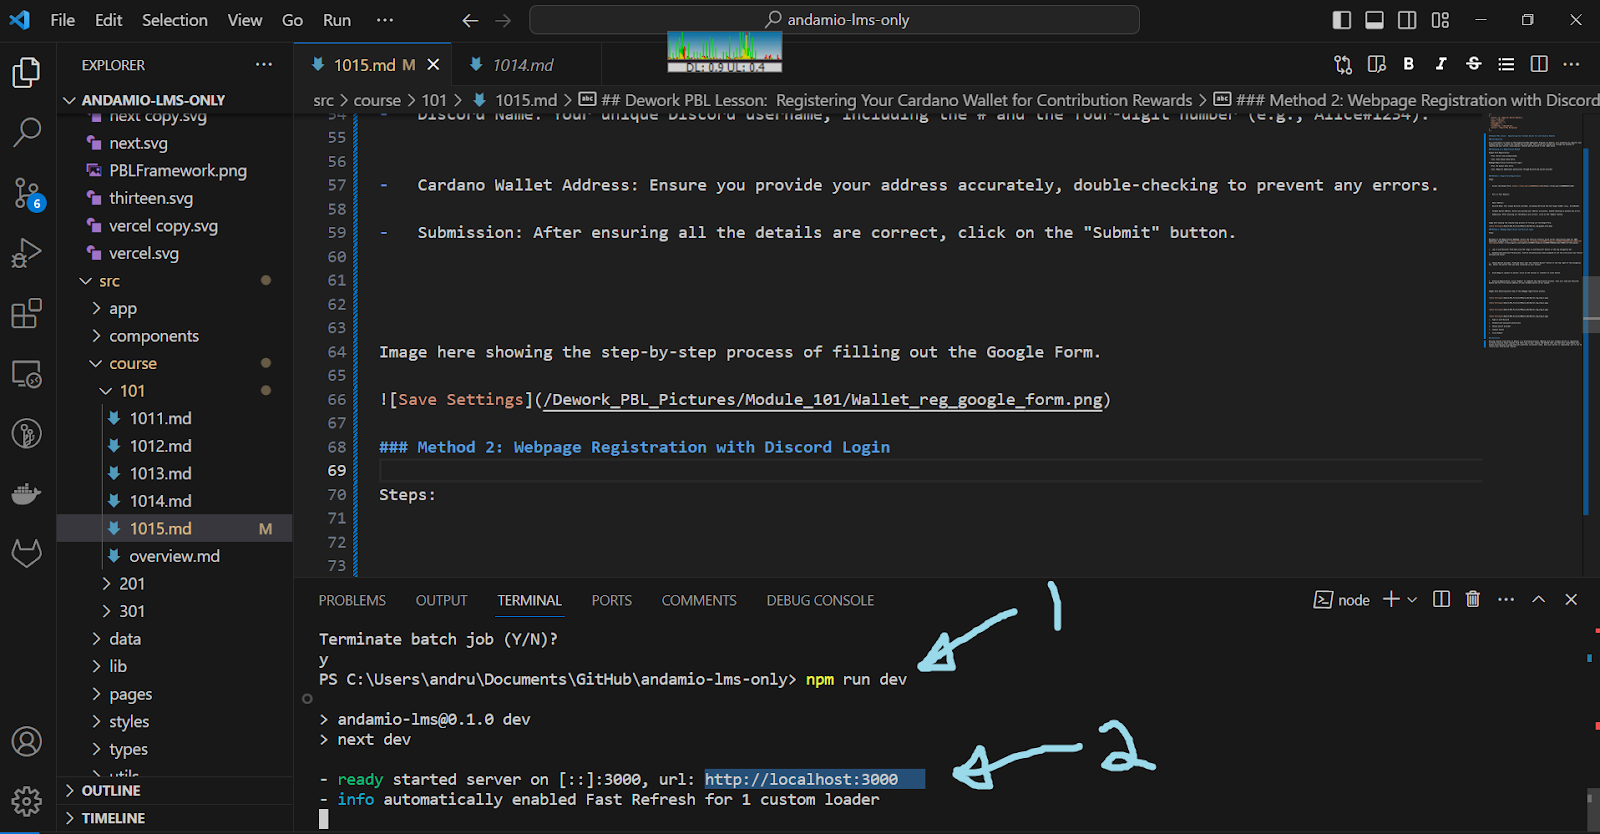
Click on View in the top and then click on Terminal to open up the terminal
Type npm install and when it’s done installing do the following:
- Type
npm run dev - Copy the url and paste in the browser to view a live version of the app
Part 3: Commit changes
Now that your app is live in the browser, you are able to view any changes you make to the lessons. To make changes to a lesson you would first need to navigate to the lesson.
Expand the src folder and select the module you want to edit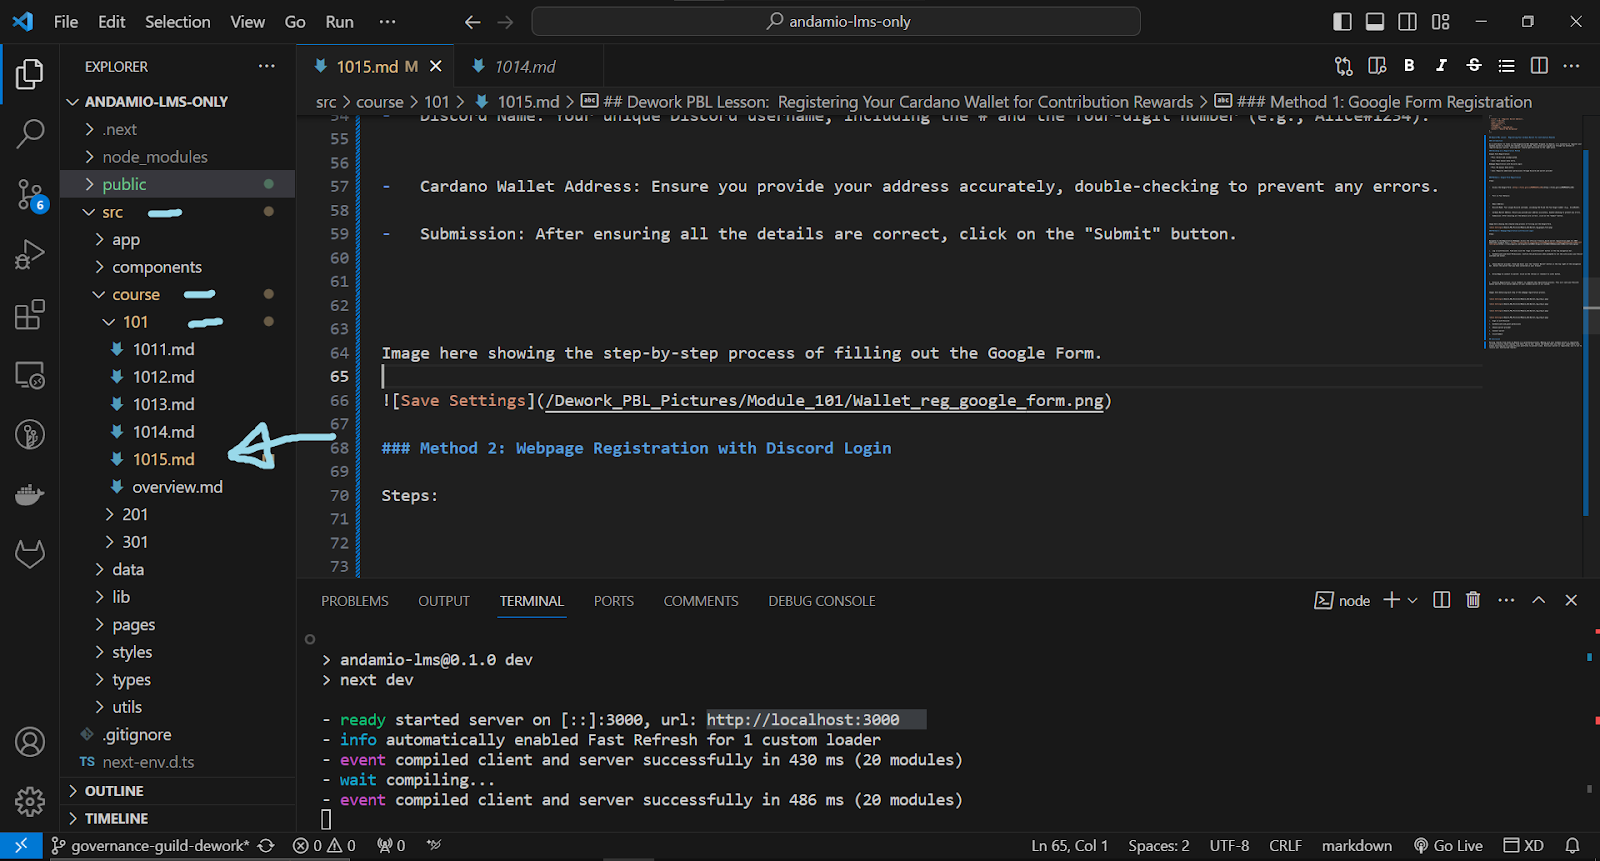
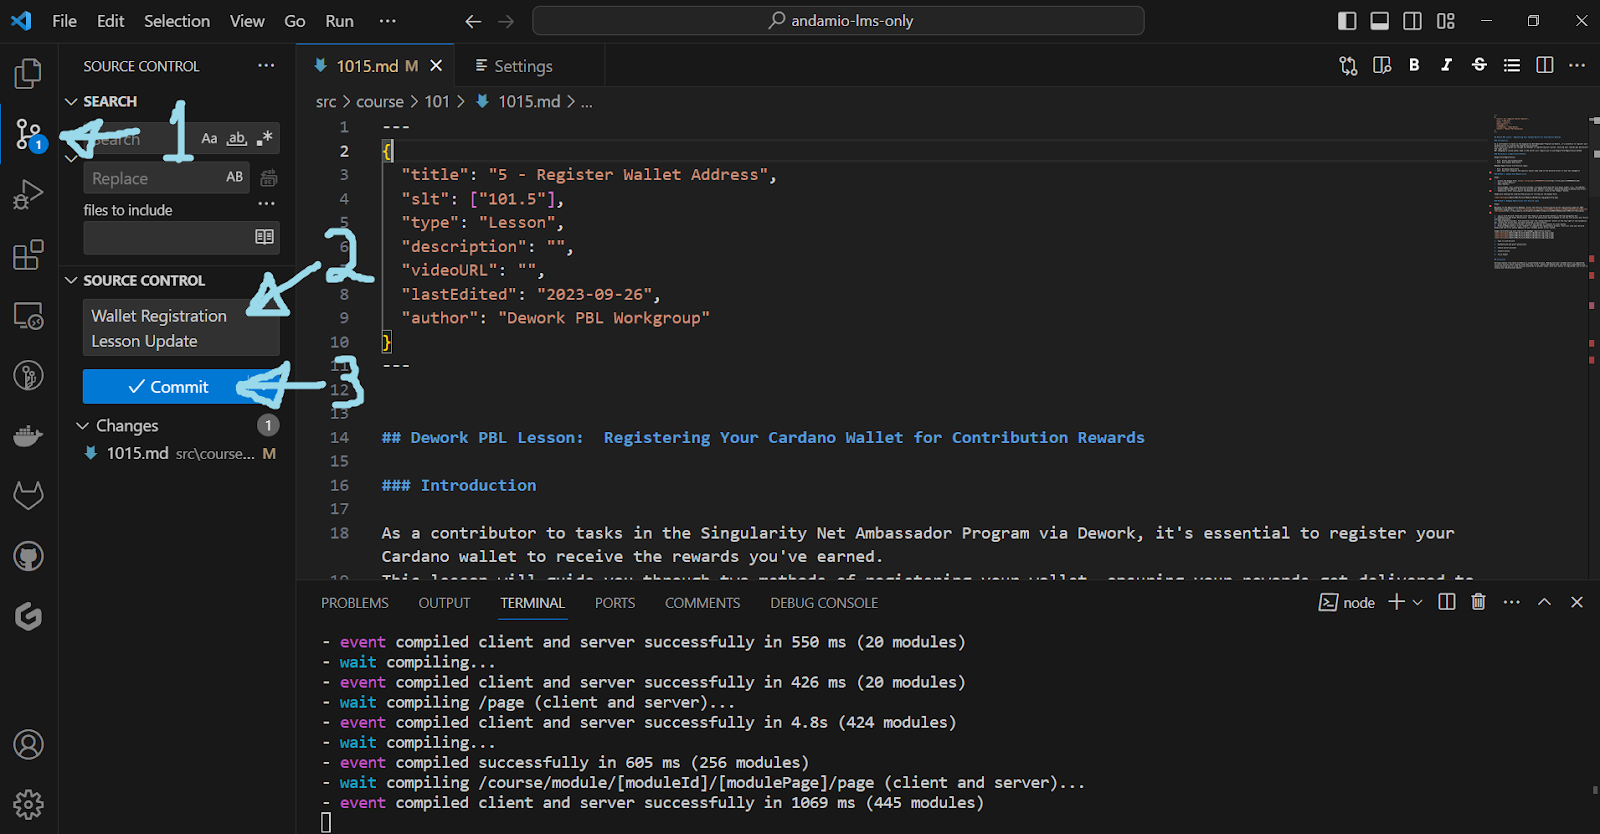
After you made the necessary edits to the lesson please follow these steps
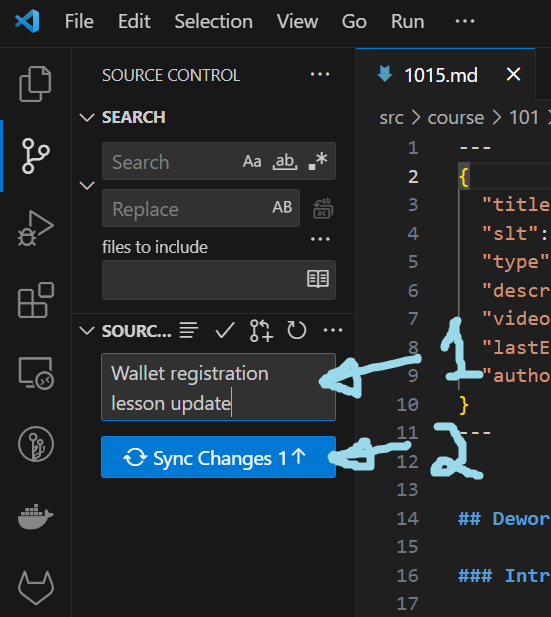
- Click on the source Control button in the left
- Type a message so you know what this update was about
- Click on the commit button
After you click the commit button you’ll see the button change to “Sync Changes”.
Follow these steps to complete the process
- Enter the same message as before, so you know what the update was about.
- Click the Sync Changes button.